
How to Gel Stain Honey Oak Cabinets: A Simple DIY That Will Wow Your Guests!

Honey oak cabinets can bring warmth to any kitchen, but their tone can sometimes feel outdated or too yellow. If you’re looking to refresh your space without a full remodel, gel staining is a fantastic, budget-friendly option that can transform your cabinetry. This easy DIY project not only enhances the beauty of your cabinets but also gives them a modern touch that will impress your guests.
Embrace your creativity as you embark on this staining journey. With just a few materials and a little elbow grease, you can achieve a stunning finish that elevates your home decor. Whether you’re a seasoned DIYer or a complete beginner, this guide will walk you through the steps to successfully gel stain your honey oak cabinets and create a kitchen that feels updated and inviting.
1. Gather Your Supplies

Before diving into the gel stain process, it’s crucial to gather all your supplies. You’ll need gel stain in your chosen color, a foam brush or a lint-free cloth, painter’s tape, a drop cloth to protect your floors, and sandpaper or a sanding sponge. Don’t forget gloves to protect your hands and a mask to avoid inhaling fumes.
Ensure your workspace is well-ventilated so that you can work comfortably. Set aside enough time for the project, as proper drying and curing can take a while. Having everything ready will make your DIY experience smoother and more enjoyable.
Check with your local home improvement store for recommendations on the best gel stains for your project. Some brands offer samples, which is a great way to test colors before committing.
2. Clean the Cabinets Thoroughly

Cleaning your cabinets is a vital step that shouldn’t be skipped. Remove any dust, grease, and grime to ensure the gel stain adheres properly. Use a mixture of warm water and mild detergent, and don’t forget to rinse well afterwards.
For stubborn spots, a gentle scrub with a non-abrasive sponge can help. Pay special attention to the corners and crevices where dirt tends to accumulate. Once cleaned, dry the cabinets completely with a lint-free cloth.
A clean surface is essential for a smooth finish, and skipping this step can lead to an uneven stain job. Take your time here; your cabinets will thank you later!
3. Sand the Surface Lightly

After cleaning, it’s time to prepare the surface for staining by lightly sanding the cabinets. Use a fine-grit sandpaper to scuff the surface without removing too much wood. This helps the stain penetrate better and creates a smoother finish.
Make sure to sand in the direction of the wood grain to avoid scratches. Once you’ve lightly sanded all surfaces, wipe them down with a damp cloth to remove any dust created during this process.
If you have any areas with a high gloss finish, sanding becomes even more crucial as it allows the gel stain to bond properly. Without this step, you might end up with a blotchy finish that won’t look professional.
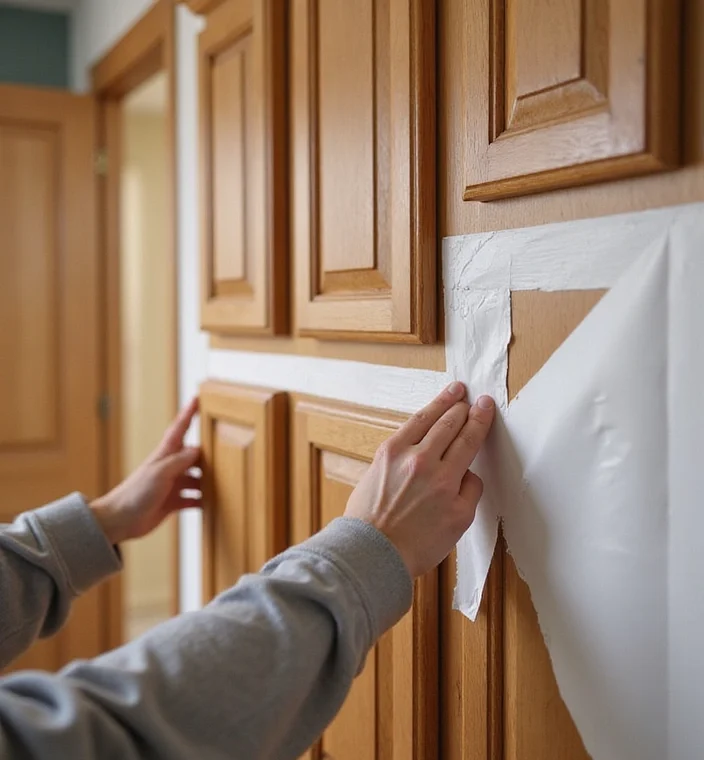
4. Apply Painter’s Tape for Precision

Using painter’s tape is a must if you want clean and precise lines around your cabinets. Tape off any areas you don’t want stained, such as walls or countertops. This will help you avoid mess and keep your project looking professional.
Take your time applying the tape, ensuring it’s securely attached and there are no gaps for stain to seep through. If you do get any stain on surfaces you didn’t intend to, it can be tough to clean up, so this step is worth the effort.
Use a utility knife to trim any excess tape for a sharper edge. This little trick can make a big difference in the final look of your cabinets.
Precision is key in DIY projects! A little painter’s tape can save you from messy stains and give your cabinets that professional touch. Your hard work deserves clean lines!
5. Start Gel Staining – The Fun Part!

Now comes the exciting part – applying the gel stain! Using a foam brush or a lint-free cloth, apply the gel stain evenly across the cabinet surface. Work in manageable sections, and remember that less is more; it’s easier to add more stain than to remove it.
For a richer color, allow the gel stain to sit for several minutes before wiping off the excess with a clean rag. This step helps deepen the color and achieve that beautiful finish. Don’t rush; take your time to ensure even coverage.
Always test the stain on a small, inconspicuous area first to ensure you love the color. This way, you won’t be surprised by the final outcome!
Get ready for the fun part! Applying gel stain is where your creativity shines—remember, less is more. Take your time, and let that beautiful finish speak for itself!
6. Wipe Off Excess Stain

Once you’ve applied the gel stain, it’s crucial to wipe off any unwanted excess. Using a clean cloth, gently wipe in the direction of the wood grain to remove any pooling stain. This step ensures the finish is even and avoids that sticky, overly glossy look.
Be attentive; some areas might absorb more stain than others, so adjust your wiping technique accordingly. If you’re aiming for a darker finish, you can leave the stain on a little longer before wiping.
Don’t be afraid to go back and touch up areas that might need a little more color. This process may take time, but the end result will be worth it.
To achieve that flawless finish, remember: a little goes a long way! Wipe away excess gel stain with care, and embrace the beauty of even tones in your cabinets.
7. Allow to Dry – Patience is Key

After you’ve wiped off the excess stain, it’s time to let your cabinets dry. The drying time can vary based on the specific gel stain you used, but most products recommend at least 6-8 hours. This waiting period is essential for the stain to cure properly and develop its final hue.
Avoid touching the surfaces during this time, as it can mar the finish. For best results, consider leaving them to dry overnight, so they’re ready for the next step in the morning.
Ensure your workspace remains dust-free during the drying process to prevent particles from sticking to your newly stained cabinets.
8. Assess the Finish – Add More Layers if Necessary

Once your cabinets are dry, assess the finish. You might find that one coat of gel stain isn’t enough to achieve the desired color depth. If you want a richer tone, feel free to apply an additional coat.
Just make sure to lightly sand the surface again before applying each layer to ensure proper adhesion. Follow the same process: apply, wipe off excess, and allow to dry.
Keep a close eye on your progress and make notes after each layer. This will help you track what works best for your aesthetic and ensure consistency across all cabinets.
9. Seal the Stain with a Protective Finish

To protect your hard work, sealing the stained cabinets is crucial. Once your final layer of gel stain has dried, apply a polyurethane finish to guard against scratches and wear. Choose between a matte, satin, or glossy finish, depending on your style preference.
Apply the sealant with a clean brush, following the wood grain for a smooth application. Allow the sealant to dry thoroughly as per manufacturer instructions. This step will not only enhance the color but also add durability to your cabinets.
Don’t skimp on this part! A good sealant can make a world of difference in preserving your newly stained cabinets.
Sealing your stained cabinets is like giving them a protective hug! Choose a finish that complements your style—matte, satin, or glossy—and watch your hard work shine with durability and charm.
10. Enjoy Your Beautifully Transformed Cabinets!

Congratulations! You’ve taken your honey oak cabinets from dull to dazzling with gel stain. Stand back and admire your handiwork; this transformation is not only visually stunning but also satisfying to achieve.
Show off your beautifully stained cabinets to friends and family; they won’t believe how easy the process was! Remember that maintaining the finish is important, so periodically clean them with gentle products to keep them looking fresh.
Consider adding some decorative elements like new hardware or open shelving to further enhance your space. Your kitchen is now a reflection of your style and creativity!
Conclusion

Successfully gel staining your honey oak cabinets can breathe new life into your kitchen, making it feel modern and welcoming. With just a few simple steps, you can accomplish a stunning transformation that not only enhances your home decor but also gives you bragging rights among your friends.
So roll up your sleeves, gather your supplies, and dive into this easy DIY project. Your beautifully stained cabinets await!
Frequently Asked Questions
What supplies do I need to gel stain my honey oak cabinets?
Getting started on your gel staining project is super easy! You’ll need gel stain in your chosen color, a foam brush or lint-free cloth for application, painter’s tape for clean lines, and a drop cloth to protect your surfaces. Don’t forget some mild detergent and warm water for cleaning, plus fine-grit sandpaper to prep your cabinets. Gather these supplies, and you’re ready to transform those honey oak cabinets!
How do I ensure that the gel stain adheres well to my cabinets?
Great question! The secret to a successful gel stain application is all in the prep work. Start by cleaning your cabinets thoroughly to remove any dust, grease, or grime. Then, lightly sand the surface with fine-grit sandpaper. This not only cleans the surface but also helps the gel stain penetrate better. With these steps, you’ll set the stage for a beautiful, lasting finish!
How long does it take for gel stain to dry on cabinets?
Patience is key when it comes to gel staining! Generally, you’ll want to let the gel stain dry for at least 6-8 hours, but this can vary based on the specific product you use. It’s always best to check the manufacturer’s instructions for precise drying times. Once dry, assess the finish and feel free to apply additional coats for that rich, stunning color you desire!
Do I need to seal the gel stain after applying it to my cabinets?
Absolutely! Sealing your gel-stained cabinets is crucial to protect your hard work. After the last layer of gel stain has dried, apply a polyurethane finish. This will guard against scratches, wear, and tear, ensuring your beautifully transformed cabinets last for years to come. Choose between a matte or glossy finish based on your style preference!
Can I gel stain over existing finishes on my honey oak cabinets?
Yes, you can! However, it’s important to note that the existing finish may affect the final color and adhesion of the gel stain. Make sure to clean and lightly sand the surface to create a good bond. If your cabinets have a heavy gloss or are in poor condition, you might consider stripping the old finish first for the best results. This way, your new gel stain will shine beautifully!


0 Comment